

Very recently, we announced the open sourcing of the Mojo standard library. This has marked a significant milestone for our community, not only providing the best way to understand the implementation details of various functionalities within the standard library but also creating an excellent opportunity to contribute to Mojo. Since the announcement, we have been fortunate to receive a range of contributions, from documentation fixes to code changes. To better foster contributions from our community, this blog post will guide you through the step-by-step process of contributing to the Mojo standard library, including finding a GitHub issue, initial Git setup, writing code, performing local testing and finally creating a pull request (PR) and getting it merged. Please also refer to our contribution guide that contains detailed information, including Mojo code of conduct and style guide, not covered in this post.
Contributing to Mojo can take many forms; from participating in discussions and identifying or reporting issues, to proposing language changes through RFCs. In this context, we will focus on code contributions, which involves a series of steps that we are going to cover next.
Contribution steps: from issue to pull request
If you are new to Mojo, begin with the quick start and familiarize yourself with the Mojo documentation. This post assumes a foundational understanding of Mojo.
First, it is important to note that the Mojo standard library is hosted on GitHub and we follow the Git pull request workflow for code contribution so basic knowledge of Git is essential. Secondly, the Mojo standard library maintains two branches: main and nightly. The main branch contains the latest released version of Mojo and is updated with each release. In contrast, the nightly branch holds all the new unreleased changes to the codebase, and contributions are made against the latest code changes in the nightly branch.
To install the nightly Mojo build, follow these steps
or update the nightly via
Then follow the instructions as indicated in the Mojo installer guide.
This step is crucial as it incorporates the latest code changes, enabling us to proceed with our contribution and perform local testing, details of which will be discussed later.
We are now ready to start our contribution journey by following these steps:
Step 0: Find a GitHub issue that interests you
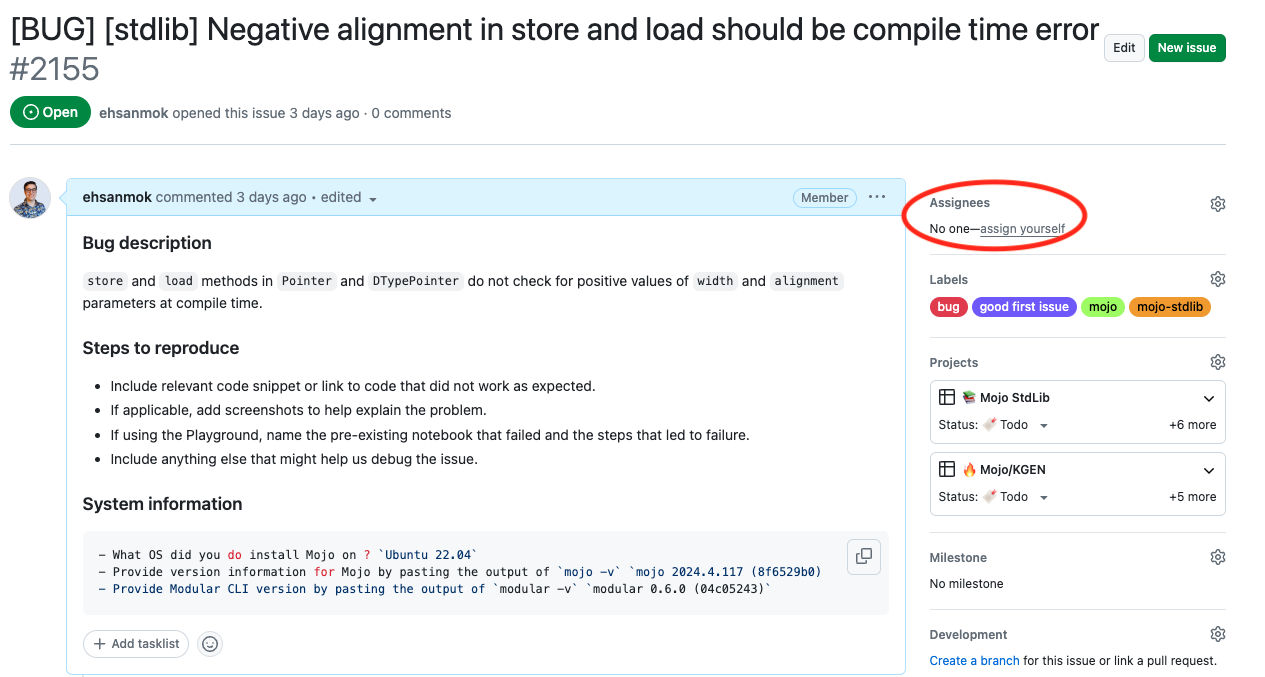
If it is the first time and you are unsure which issue to choose, we recommend looking for an issue labeled with good-first-issue. To avoid duplicated effort, ensure that the issue is not already assigned to someone else and that there isn’t a linked pull request already in progress. For the purpose of this blog post, we have chosen this issue to work on.
Step 1: Fork the repository and Git remote setup
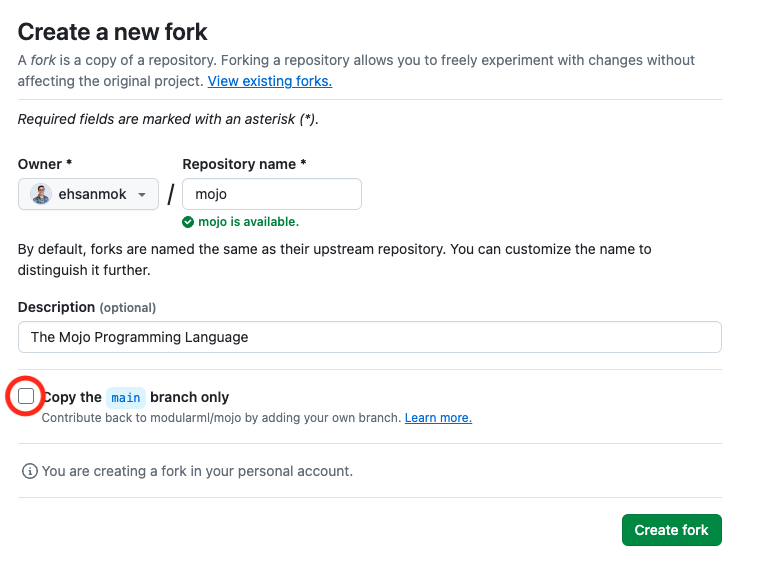
If this is your first contribution, start by forking the repository. By default, GitHub forks only the main branch. However, as our work will use the nightly branch, make sure to uncheck the Copy the main branch only option prior to forking.
Once our fork is created, it will be accessible at https://github.com/<username>/mojo
Next, we clone our fork to our local machine:
To clarify, we are working with three key entities:
- Since everything stems from https://github.com/modularml/mojo which is referred to as upstream. This exists remotely and in Git terminology, is known as the upstream remote.
- Our fork at <username>/mojo, known as origin. Like upstream this is also stored remotely.
- Our local clone of the fork which is stored on our machine.
Given that a fork can diverge from the original repository that it was forked from, it is crucial to configure our local clone to track changes from upstream . Navigate into the clone directory and set up the upstream remote as follows:
Now, to synchronize our fork with the latest changes from upstream, we execute
Or more concisely
This sequence fetches updates from upstream and rebases, which means it integrates these changes into our local clone, placing any of our modifications (Git commits) on top. It is highly recommended to regularly update from the upstream. This proactive approach helps identify and resolve any merge conflicts at the earliest opportunity.
Set up a tracking branch
After cloning the repository, running git branch -a lists all the available branches
Given that our contributions are made against the nightly branch, we will need to create a tracking branch as follows
This command creates a local nightly branch in our clone, synchronized with origin/nightly. We will see
Here, origin refers to our fork (<username>/mojo) and is distinct from the upstream (modularml/mojo). We have already set up the upstream for syncing purposes, as demonstrated previously.
Now we are on a tracking nightly local branch. For our fix, let’s create a dedicated branch and call it fix-branch
With fix-branch ready, we can proceed to implement our fixes.
Step 2: Local development and git push
To contribute to Mojo, LLVM installation is a prerequisite.
For Ubuntu users, install the latest LLVM version 17.0 with these commands
For MacOS users, one option is with
If multiple LLVM versions are installed, manage their precedence as needed. After installing LLVM 17, then binaries like llvm-config-17 or FileCheck-17 are versioned. To simplify access, set them as default with a higher priority, e.g. 100 (change this according to any previous setup)
Building the standard library
We start by building the standard library and making sure everything functions correctly. We can do so by using the provided build-stdlib.sh script
This script creates a build directory for the build artifacts.
Running tests locally
We install the necessary Python package for testing with
With all the dependencies in place, we should be able to run the unit tests successfully using the run-tests.sh script
If you encounter issues such as FileCheck is not found, refer to the part we installed LLVM and make sure FileCheck is added to your PATH, for example via
Implementing fixes
With the setup ready, we can proceed to code. For simple changes such as the fix for the chosen issue, a single commit may suffice. We should also write unit tests and run them ./stdlib/scripts/run-tests.sh . For this specific PR, the test is already covered in the compile time (because we have added constrained statements).
We should make sure our code is also formatted which can be done via mojo format command.
Next, we proceed with pushing our commits
If there are multiple commits, we can group them together which we will cover below.
Grouping multiple commits
For complicated code changes, it is advised to keep the Git commits atomic which means each commit is doing one and only one thing. Later, if we desire we can group multiple commits into one by doing git rebase.
First we configure your Git editor if not have done so
Assume we want to merge the last 3 commit together, we can do interactive rebase as follows
A text editor will pop up
- Set the first top commit as pick (or p for short), and change later ones to squash (or s for short).
- After you save the file, another text editor will pop open to ask you modify the combined commit message.
- Push the changes to your fork, you need to force push git push —-force
Important note: It is fine to force push to your own fork, as long as the commits changed are only yours. Otherwise, it can have bad consequences as it rewrites the Git history. In case there are multiple collaborators who use your branch, the safer option is git push —-force-with-lease
Step 3: Create a pull request against the nightly branch
Once our Git commits are finalized, we are ready to create a pull request. We can do so by navigating to our fork repository on GitHub and following the prompt “Create pull request”. This action takes us to a new page where we can define the specifics of our pull request. It is crucial to choose the nightly branch as shown below

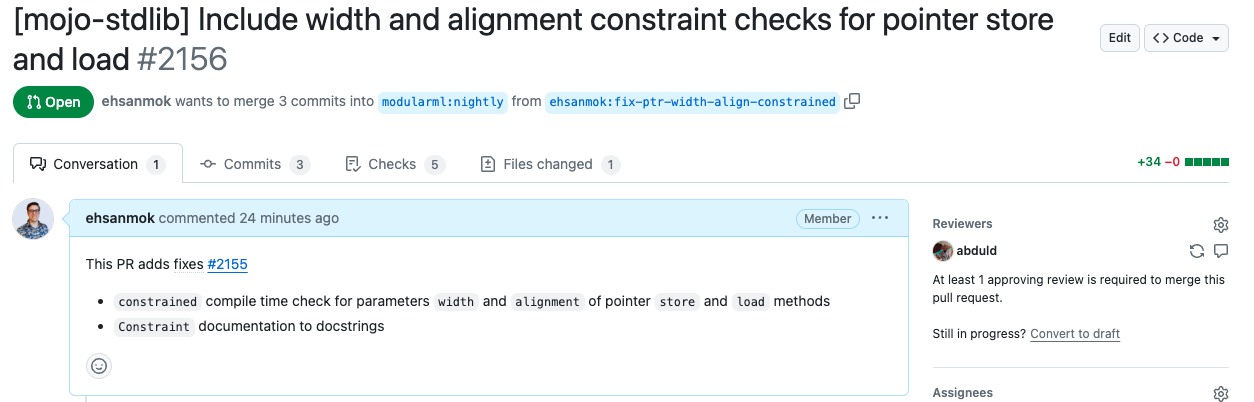
As part of our contribution guidelines, it is important to choose a descriptive title. Additionally, it is required to prepend the title with [mojo-stdlib] to better keep track of the related PRs in Mojo codebase. Moreover, we should also write a detailed description of the changes and include a link to the related issue
Step 4: Sign your commit, monitor CI failures and reviewers feedback
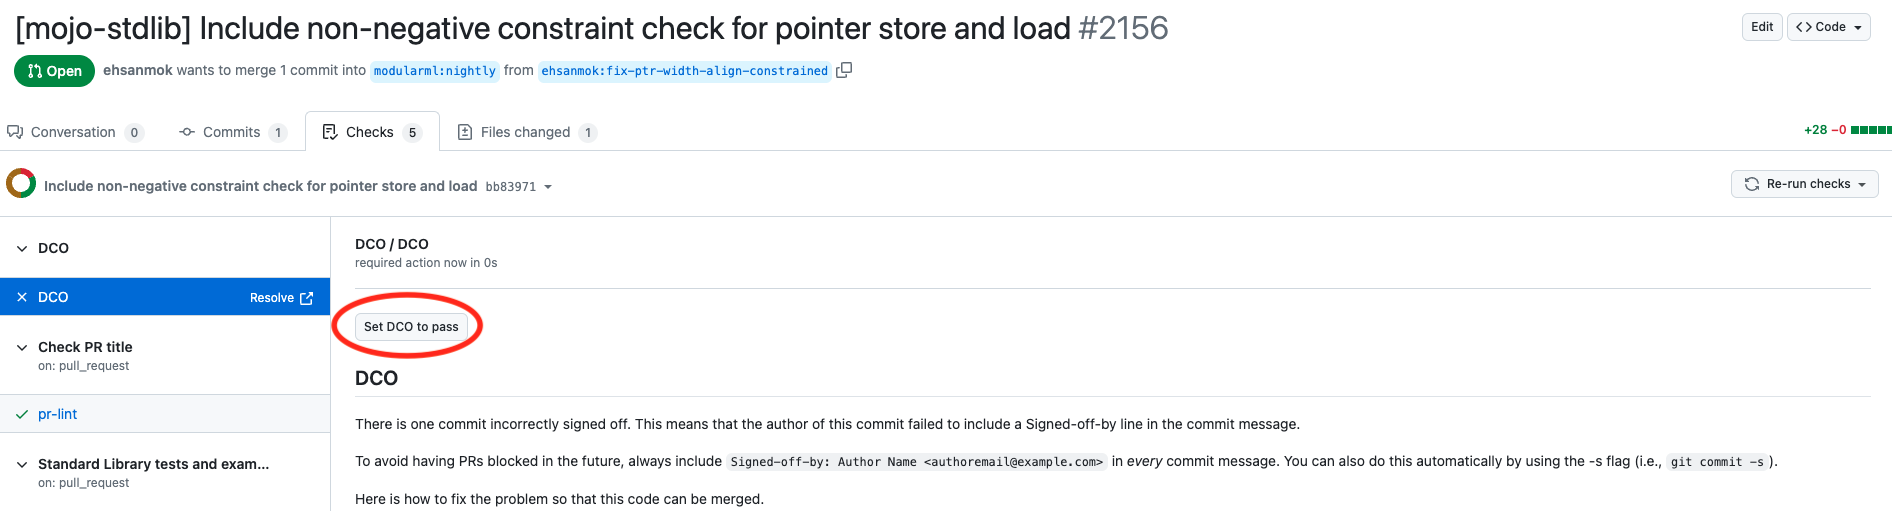
To ensure the integrity of contributions, each commit must be signed. The standard library follows the Developer Certificate of Origin protocol, established by the Linux Foundation. This step is integrated in our continuous integration (CI). During the CI checks, we look for the DCO status. Then we select the DCS option and proceed to confirm our agreement by clicking on Set DCO to pass.
Once the commit is signed, keep an eye on any CI failures including formatting issues or failed unit tests. Your PR will be reviewed in a timely manner and reviewers comments should be addressed to get the final approval.
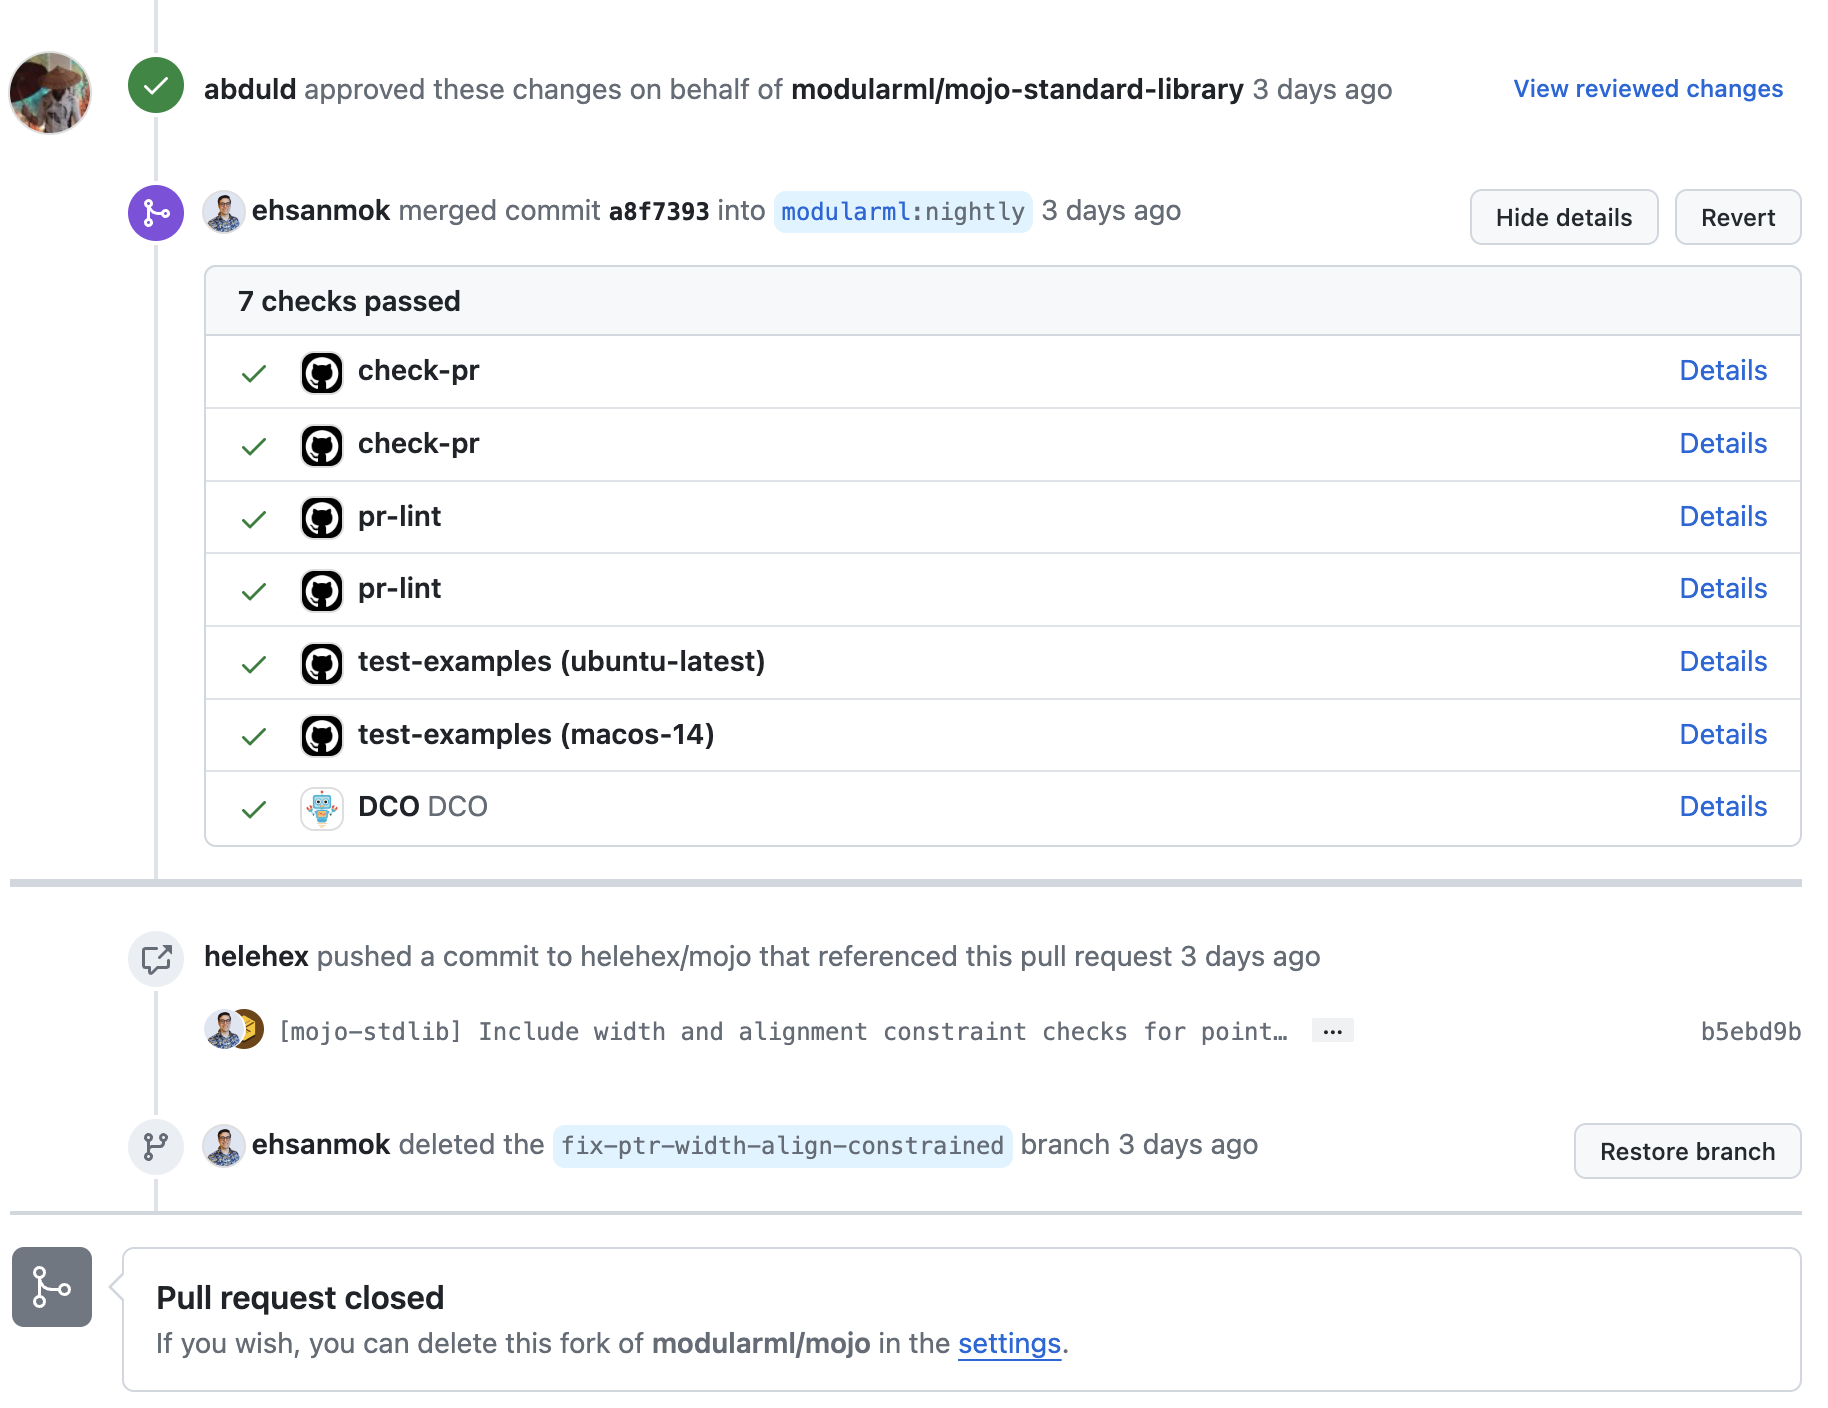
Step 5: Get approval and merge
Once all criteria are met and our PR is approved by the Mojo standard library team, it will be merged into the codebase.
That is it! 🎉 Congratulations on your successful contribution to Mojo 🔥❤️
Conclusion
Throughout this guide, we have covered all the steps required for contributing to the Mojo standard library. From finding a starting point and setting up the necessary Git workflow, to building, testing locally, and submitting a pull request, we have covered the groundwork to get you started. Remember the initial setup steps need to be completed just once. We hope that this post has equipped you with the knowledge and confidence to begin your contribution journey to the standard library.
Additional resources:
- Get started with Mojo.
- Head over to the Mojo docs and Mojo programming manual.
- Join our Discord community.
- Contribute to discussions on the Mojo and MAX GitHub.
Report feedback, including issues on our Mojo and MAX GitHub tracker.
Until next time!🔥
